
How to Carve Survival Tools with a Knife: A Beginner’s Guide to Bushcraft Knife Skills
Learn how to carve survival tools with a knife in the wild. This beginner-friendly bushcraft guide covers carving techniques, tool ideas, safety tips, and wood selection for wilderness survival.
How to Carve Survival Tools with a Knife: A Beginner’s Guide to Bushcraft Knife Skills
Carving tools with a survival knife is one of the most essential wilderness skills you can learn. Whether you’re crafting basic gear for bushcraft or improvising tools in an emergency, knowing how to safely and effectively use your knife can make a huge difference. This guide walks you through everything you need to get started — from choosing the right wood to shaping basic but incredibly useful tools in the wild.
Why Carving Tools in the Wild Matters
In survival situations, improvisation is everything. The ability to carve useful tools with just your knife and some nearby wood gives you an edge in the backcountry. You might need a quick fishing spear, a cooking stick, tent pegs, or a makeshift mallet. Instead of relying solely on gear, carving lets you create what you need with your hands, your brain, and your blade. It's the same mindset behind crafting other primitive tools, like cordage, fish traps, or even basic stone blades when modern gear isn’t available. That’s the essence of bushcraft.
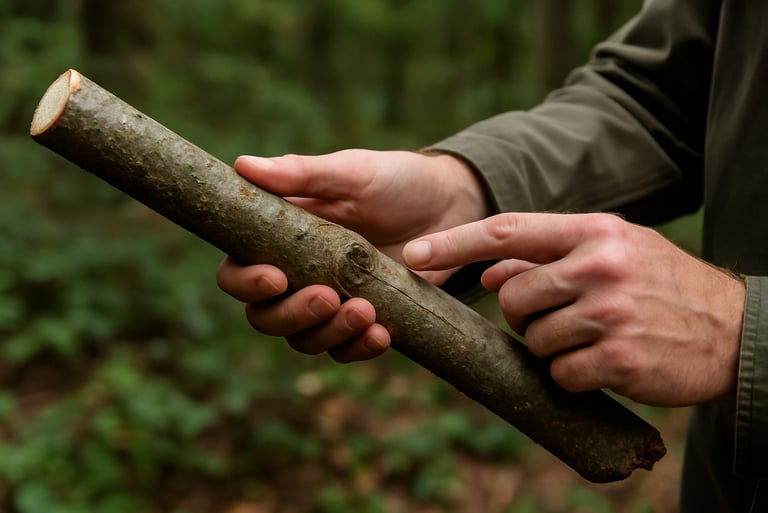
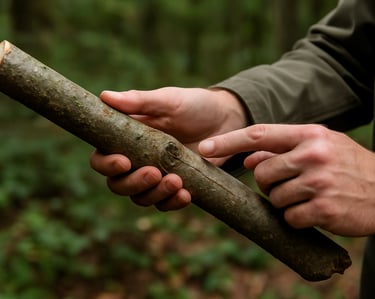
Choosing the Right Wood for Carving
Not all sticks are equal. Look for green wood — it’s softer and easier to carve than dry, dead branches. Willow, birch, cedar, and poplar are great choices if they’re available. Avoid hardwoods like oak unless you have no other options, as they can dull your blade faster and are harder to shape.
Examine the branch for knots, cracks, or signs of rot. A clean, straight piece of wood that’s about wrist-thick is perfect for carving most simple tools.
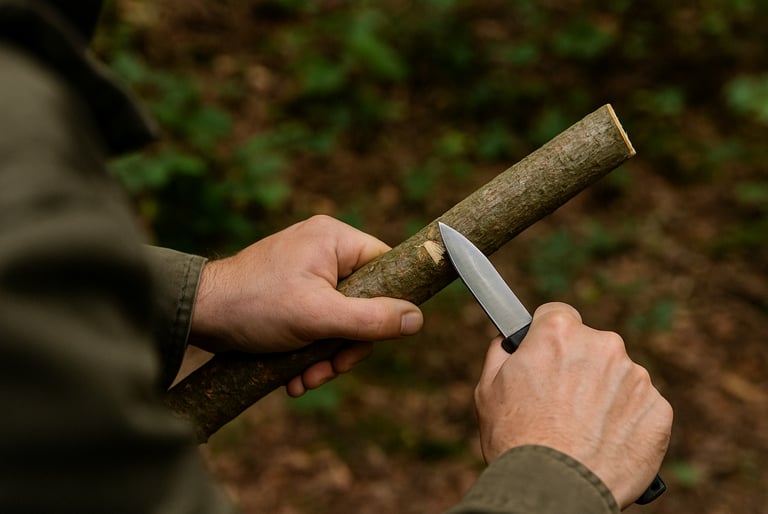
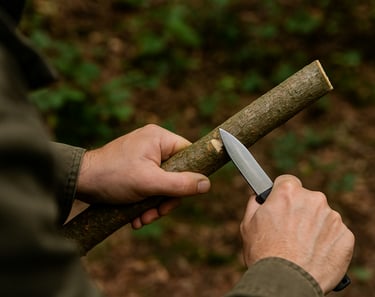
Essential Safety Tips Before You Start Carving
Before you put knife to wood, always remember: safety first. Use a stable, seated position to avoid slips. Carve away from your body, never toward it. Keep your fingers behind the blade at all times. Make slow, controlled cuts rather than hacking or twisting the knife.
A small mistake with a blade can lead to a serious injury and that’s the last thing you want when you're out in the wild. It’s why carrying a wilderness first aid kit, and knowing how to use it, is such an important part of basic survival skills. If possible, carry a small first aid kit that includes bandages and antiseptic, just in case.
Basic Tools You Can Carve with a Survival Knife
You don’t need to be a master whittler to make practical items. Here are a few examples of tools you can easily carve with a good survival knife:
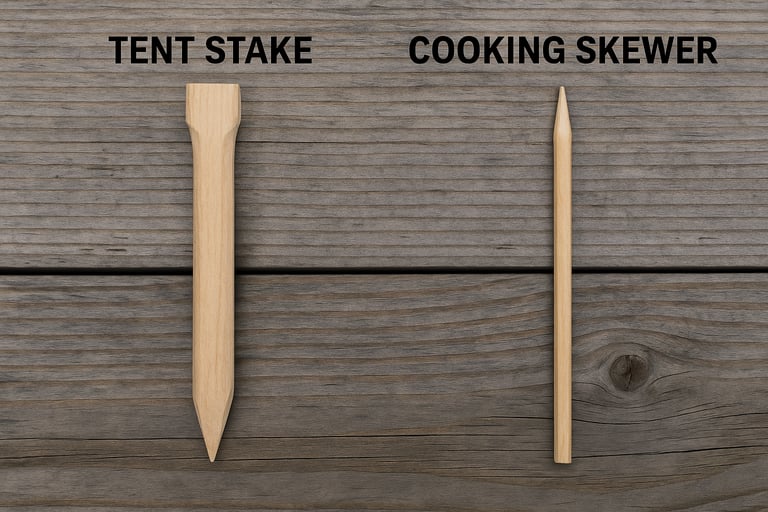
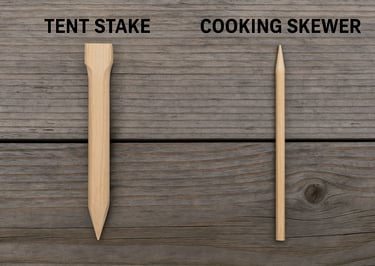
A tent stake is one of the easiest to start with — carve a point at one end, then flatten the top to prevent splitting when you drive it into the ground.
A cooking skewer can be made by sharpening a long, straight stick and slightly notching the other end to keep it from rolling.
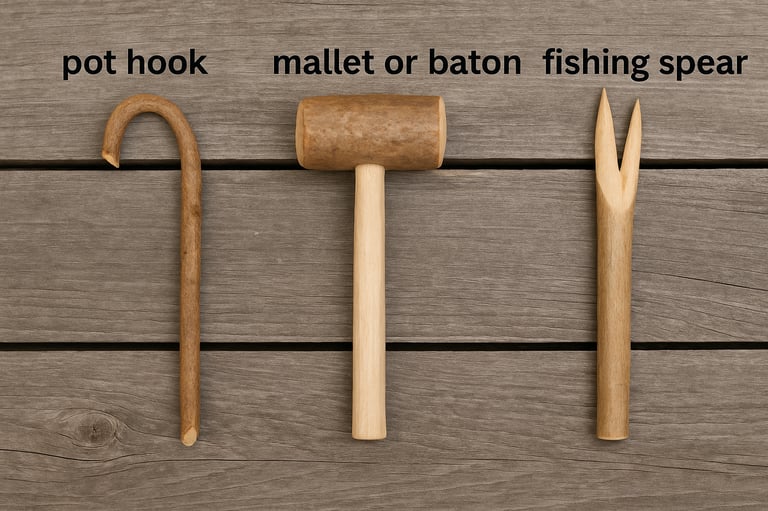
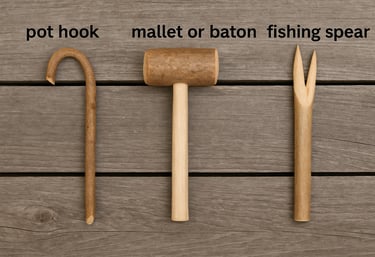
A pot hook lets you hang containers over a fire. Find a sturdy Y-shaped branch, trim off the bark, and carve small notches to hold your pot in place.
A baton or mallet can help with splitting wood or pounding in stakes. Choose a thick piece of green wood and smooth down the handle for better grip.
A fishing spear or gig can be made by splitting the tip of a long branch and wedging a smaller stick inside to hold the tines open, then sharpening the ends. You can also explore more detailed methods for making a primitive spear or atlatl for hunting and self-defense.
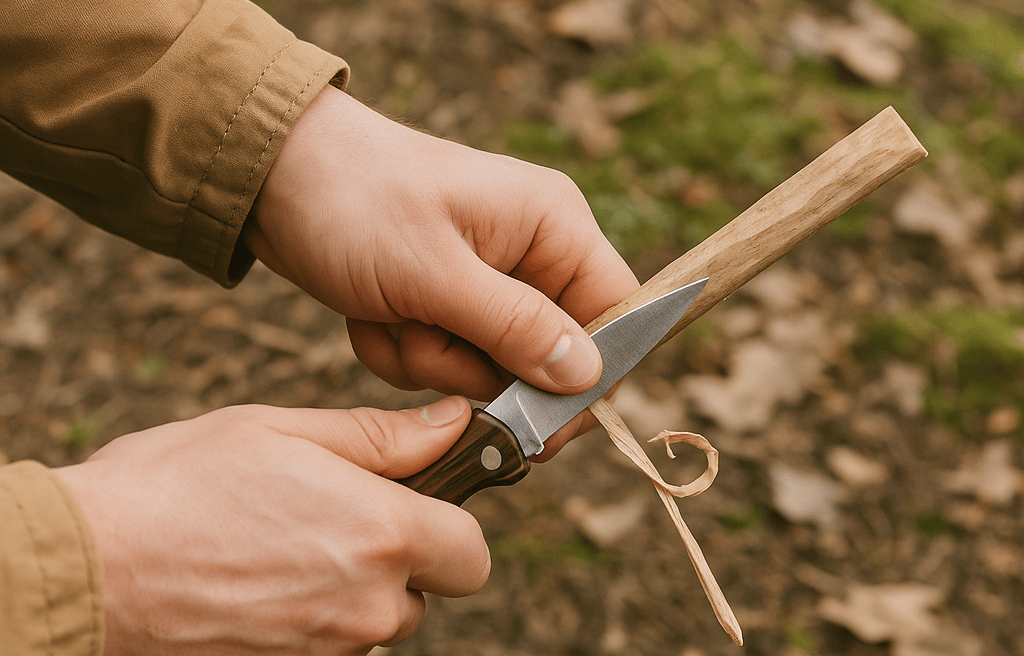
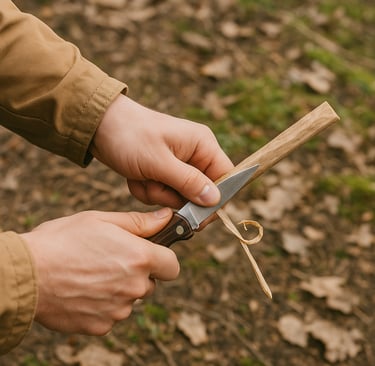
Carving Techniques Every Beginner Should Know
To carve efficiently and safely, start with these basic knife techniques:
The push cut involves pushing the blade forward while applying downward pressure. This is great for rough shaping.
The pull cut (or paring cut) uses a pulling motion toward your thumb — but always keep your thumb braced on the wood, not in the blade's path.
The stop cut helps control the depth of your carving. First, make a straight downward cut, then shave into it from above to create notches or shapes.
Practice these slowly until they feel natural. Over time, you'll get better control, cleaner cuts, and fewer accidents.
Caring for Your Knife After Carving
After carving, wipe your blade clean and dry. Tree sap and moisture can corrode your knife if left for long. If you’ve been working with resinous wood like pine, use a bit of alcohol or hand sanitizer to remove the sticky residue.
Check for nicks or dull spots in the blade and strop or sharpen as needed. A well-maintained knife lasts longer and performs better — especially when your life might depend on it.
Practice Makes Practical
Your first few carving projects won’t be perfect — and that’s okay. The key is to keep practicing. Try carving different tools with various types of wood to build your confidence. Over time, you’ll develop muscle memory, learn what works best, and move from simple stakes to more advanced items like trap components or bow drill sets.
Every stick you carve teaches you something new about your knife, the wood, and yourself.
© 2025. All rights reserved About | Privacy Policy | Terms and Conditions | Affiliate Disclosure | Disclaimer