
How to Build a Lean-To Shelter for Wilderness Survival
Learn how to build a lean-to shelter in the wild with this easy step-by-step guide. Perfect for survival, bushcraft, or emergency situations—no prior experience needed!

How to Build a Lean-To Shelter for Wilderness Survival
A Simple and Reliable Survival Shelter You Can Make Fast
If you ever find yourself caught outdoors without a tent, knowing how to build a lean-to shelter can make all the difference. A lean-to is one of the most basic and effective emergency shelters you can construct using natural materials or a simple tarp. It provides solid protection from wind and rain, and when paired with a fire, can offer surprising warmth and comfort.
Whether you’re camping, practicing bushcraft, or surviving an unexpected situation, mastering this classic shelter is a must-have skill. Let’s walk through exactly how to make a lean-to shelter step by step, in a way that’s beginner-friendly, efficient, and suited to different environments.
Choosing the Right Location for Your Lean-To Shelter
Before gathering materials or setting up, take a moment to find a good location. Look for a flat, dry area that's protected from wind and away from hazards like dead trees or low-lying flood zones. Ideally, choose a site near resources like branches, leaves, and possibly a water source — but not too close to water, which can attract animals or insects.
If you're in a colder area, position the open side of your shelter away from the prevailing wind. You'll want to build your fire in front of this opening to reflect heat into your shelter.
Building the Frame and Structure
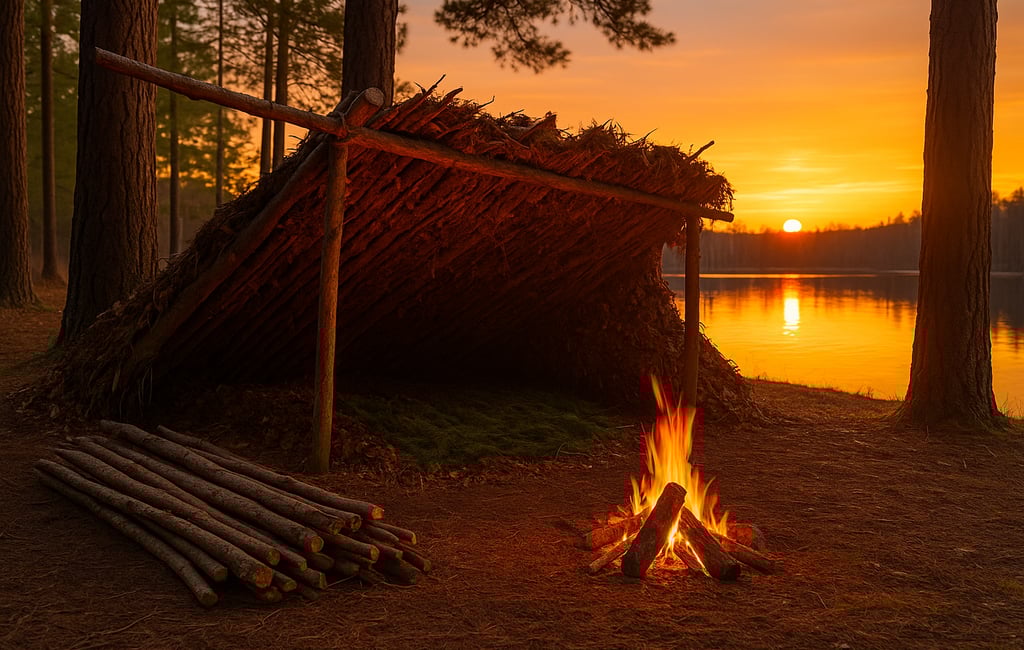
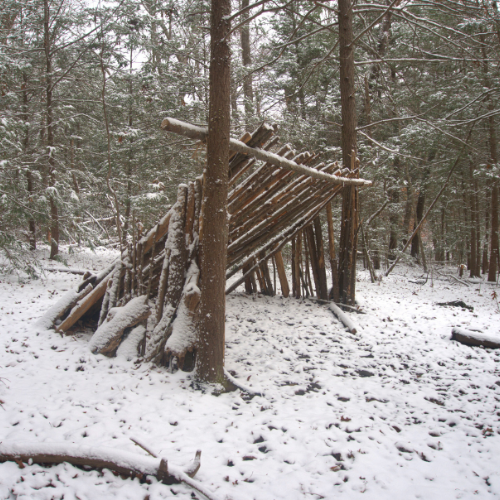
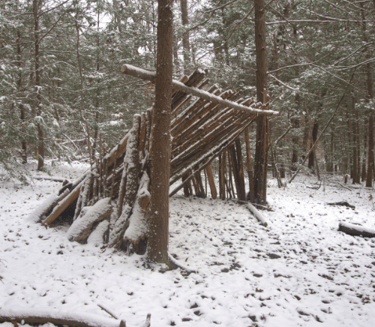
Start with your ridgepole, the long horizontal pole that will support the rest of the structure. Secure it between two sturdy trees, or brace it across two forked sticks driven into the ground. This will form the spine of your lean-to.
Next, lean long branches or poles at an angle against one side of the ridgepole, forming a sloped wall. The angle should be steep enough to shed rain and allow for sitting or lying inside. Be sure to space them close together so you have a solid foundation for insulation.
Adding Insulation and Weatherproofing
Once the frame is in place, begin layering the structure with natural debris. Cover the sloped side with pine boughs, leaves, bark, or any available materials that can shed rain and block wind. Start from the bottom and overlap each layer like shingles. If you're using a tarp instead, drape it over the sloped wall and weigh it down with rocks or logs at the edges. Also consider learning how to set up a tarp shelter or even repurpose a poncho into a shelter.
Don’t forget to insulate the ground inside your lean-to. Lay down pine boughs or construct a bough bed shelter using dry leaves or other soft materials to insulate from the cold ground. This helps trap heat and keeps your body dry and comfortable.
Making Your Shelter Warm and Comfortable
To trap more heat, especially in cold conditions, build a small fire just outside the open side of the lean-to. You can start a fire using primitive or improvised methods — a skill that’s critical for warmth and survival. A reflective wall of logs or rocks placed behind the fire will help bounce warmth back into the shelter. Always keep safety in mind — maintain a good distance and never let a fire burn unattended.
You can also add a windbreak to the sides of the shelter entrance to help retain heat and protect from gusts. Use upright logs, stacked branches, or even a spare tarp if available.
Conclusion: Mastering a Reliable Shelter Technique
The lean-to is a survival classic for good reason, it’s quick to build, flexible, and dependable in many environments. Once you’ve made one or two, the process becomes second nature. With a bit of practice, you’ll be able to set one up efficiently, even under stress or bad weather conditions.
Remember: stay dry, block the wind, insulate the ground, and always think safety first. Your lean-to shelter can be a life-saver when nature throws you a curveball.


© 2025. All rights reserved About | Privacy Policy | Terms and Conditions | Affiliate Disclosure | Disclaimer