
How to Start a Fire with a Bow Drill: A Step-by-Step Guide to Primitive Firecraft
Learn how to start a fire with a bow drill using primitive survival skills. Step-by-step guide to mastering firecraft, building confidence, and training.
How to Start a Fire with a Bow Drill: A Step-by-Step Guide to Primitive Firecraft
Why Learn the Bow Drill Fire Starting Method?
Learning how to make a fire with a bow drill connects us to one of the oldest survival techniques ever used. Unlike lighters or matches that can fail in the wild, the bow drill relies only on friction, pressure, and natural materials. Whether you're practicing bushcraft or building your wilderness survival skills, mastering the bow drill method gives you both confidence and a reliable backup fire-starting option.
If you're exploring different primitive techniques, you might also want to learn how to build a fire using the fire plough technique, another traditional friction-based approach. Or, if you’re dealing with direct sunlight and the right materials, consider trying solar fire starting as a lightweight backup method that doesn’t require gear.
What You Need for a Bow Drill Fire Kit
To get started, you’ll need a few basic items that you can often make in the field. First is the bow — ideally a curved, flexible green stick with a tight string such as paracord or natural cordage. You’ll also need a dry spindle made of non-resinous wood, about 8 to 12 inches long. Carve your fireboard from similar wood and make a small notch or depression to collect the ember. You'll also want a handhold (socket), which you can make from stone or hardwood. And lastly, prepare a dry tinder bundle — dry grass, bark, or shredded leaves — that will catch your ember and burst into flame.
Crafting and Assembling Your Bow Drill Kit
Begin by shaping the bow. A green stick about two feet long with a natural curve works best. Tie the string tight between both ends. Your spindle should be round, smooth, and about half an inch thick. Use a knife to shape the fireboard and carve a shallow divot to place your spindle. A V-shaped notch leading to the edge of the fireboard will help collect the ember. For the socket, find a comfortable piece of stone or hardwood with a small dip in the center to guide the spindle.
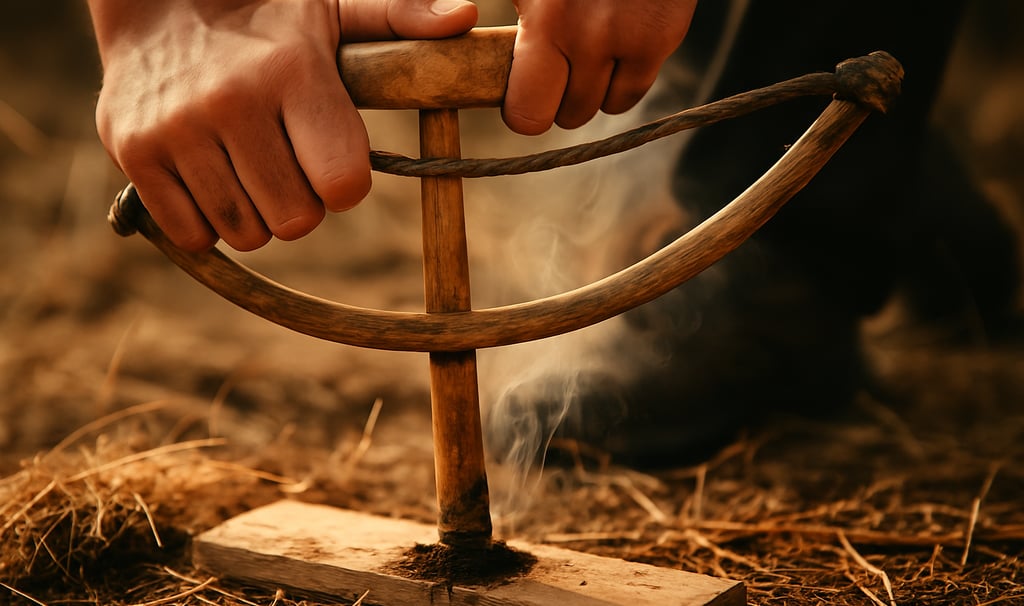
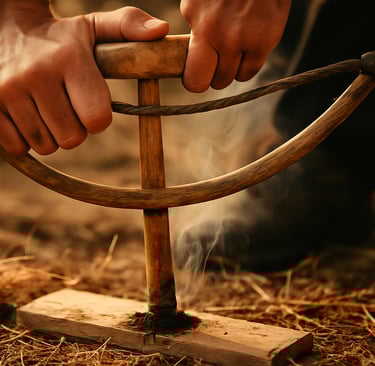
How to Use a Bow Drill to Make Fire
To use the bow drill, start by placing your fireboard flat on the ground. Loop the bowstring around the spindle once. Place the spindle vertically into the fireboard's notch and hold it steady from the top using your handhold. While keeping firm downward pressure, begin moving the bow back and forth in a controlled, smooth motion.
This method requires both technique and endurance — much like the hand drill method, which uses similar principles but no bow. On the other hand, if you’re in a situation where you have modern items like batteries and steel wool, you can also generate an electrical fire, a surprisingly fast method when materials are available.
The friction will create dust that gathers in the fireboard notch. As the motion continues and the temperature rises, you’ll notice a small wisp of smoke — that means an ember is forming.
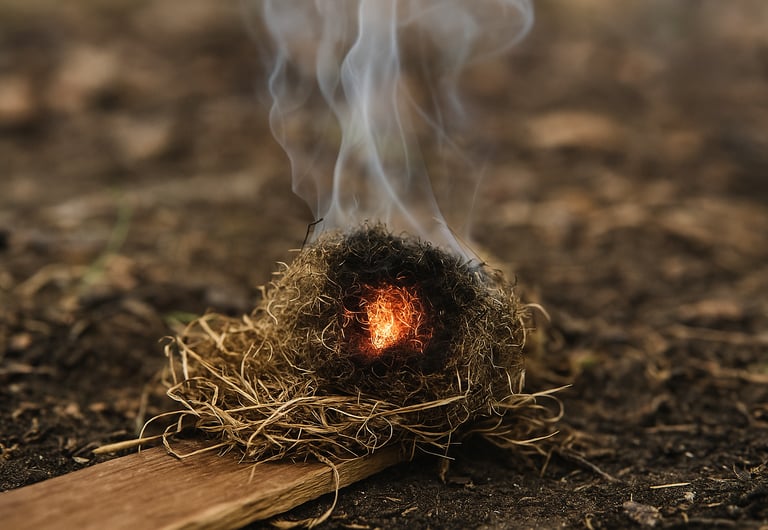
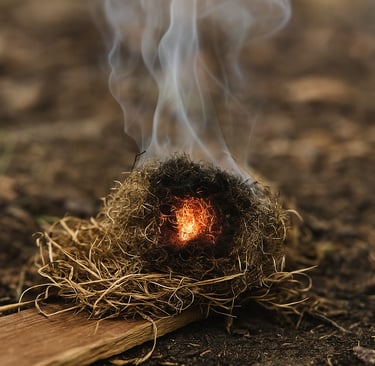
Building an Ember and Making It Catch
Once the smoke thickens and you see a glowing ember forming in the notch, stop bowing. Gently lift the spindle and fireboard away and give the ember a few moments to grow on its own. Using the edge of a knife or a thin piece of bark, carefully transfer the ember into your tinder bundle.
Turning an Ember into a Fire
Hold the tinder bundle close and gently blow on the ember. It will begin to smolder and eventually ignite into a small flame. Add small twigs and kindling to feed the flame, gradually building it up into a steady fire.
Practice the Bow Drill Fire Method Before You Rely on It
While the bow drill is one of the most effective primitive fire-starting techniques, it’s also one of the most challenging. Success depends heavily on technique, stamina, and the right conditions. And patience, lots of patience! That’s why it’s always a great idea to practice the method before you ever find yourself in the backcountry depending on it for survival.
If you practice, you’ll develop both the skill and confidence. And, when your life is truly on the line, you’ll be able to stay calm and focused knowing that you’ve successfully done it before. That self-assurance can make the difference between frustration and finally creating the ember you need to survive.
To build that confidence, you might consider trying a practice kit at home or in the wilderness. These kits let you learn and refine your technique and understand the feel of the motion, before relying on improvised materials in the wild. Once you’ve mastered the basics in a controlled setting, you’ll be much more likely to succeed when it really counts. And let's be honest, it's also kind of fun to do.
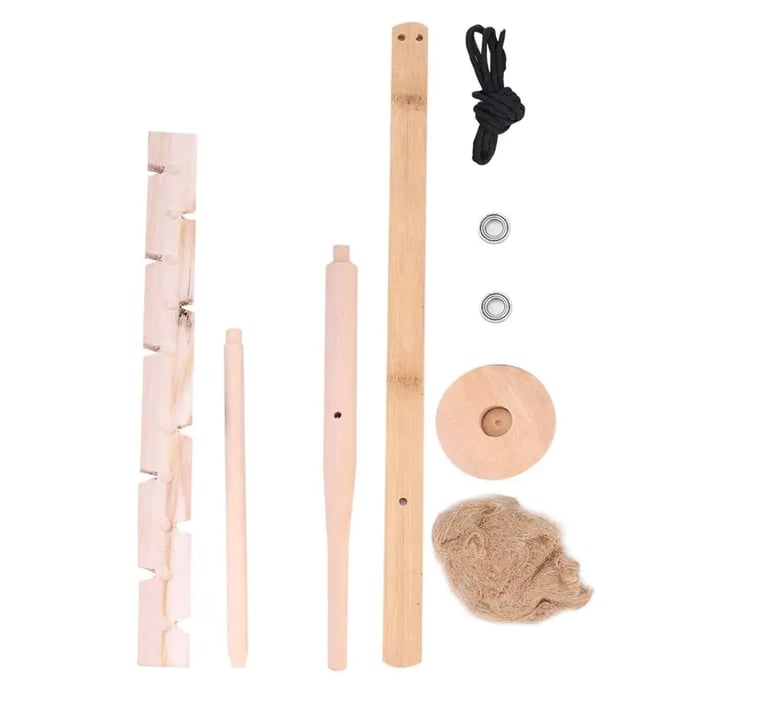
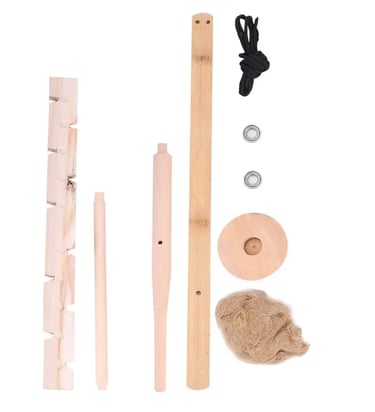
Here are a few Bow Drill Starter Kit options:
WOHPNLE Bushcraft Bow Drill Kit — This set is ergonomic and beginner-friendly, making it easier to get consistent motion while you practice. The materials are simple, and it's great for learning the method.
Click here to see the WOHPNLE Bushcraft Bow Drill Kit.
Primitive Survival Practice Bow Drill Kit — Affordable and lightweight, this is a budget kit and is ideal for anyone who just wants to master the basics without a big investment.
Click here to see the Primitive Survival Practice Bow Drill Kit.
Portable Bow Drill Kit (Ollivanders-style) — Designed to be compact and easy to carry, this kit is a good choice for backpackers or bushcrafters who want a more rugged practice set. It’s usually a bit more expensive, but it’s built for repeated use in the field.
Click here to see the Portable Bow Drill Kit (Ollivanders-style).
Final Thoughts on Mastering the Bow Drill Fire Technique
Making a fire with a bow drill might take some practice, but once you succeed, it’s incredibly rewarding. It connects you to a long lineage of human ingenuity and offers a dependable fire-starting skill for wilderness survival. Like any primitive method, success depends on technique, patience, and preparation. Stick with it, and soon it’ll be a skill you can rely on in the backcountry.


© 2025. All rights reserved About | Privacy Policy | Terms and Conditions | Affiliate Disclosure | Disclaimer