
How to Build a Wickiup Shelter: A Simple and Effective Survival Structure
Learn how to build a wickiup shelter using natural materials like saplings and brush. This beginner-friendly survival guide covers each step to create a sturdy, weather-resistant wickiup in the wild.
How to Build a Wickiup Shelter: A Simple and Effective Survival Structure
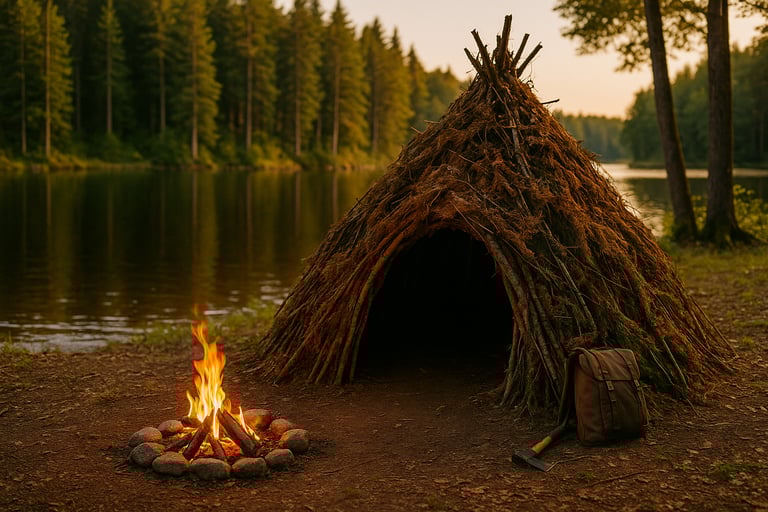
When you're out in the wild and need a sturdy, all natural shelter that can stand up to wind, rain, and even cold nights, the wickiup is one of the best options out there. It’s a time-tested survival structure made using materials commonly found in the forest — no fancy tools or gear required.
Often used by Indigenous people in the Western United States, the wickiup is a dome-shaped shelter made by bending flexible saplings into a rounded frame and covering it with natural insulation. It's incredibly effective for longer stays in one location and can be adapted to many different environments.
If you’ve never built one before, don’t worry — we’ll walk you through each step and make it simple.
What Makes the Wickiup Shelter So Useful?
The wickiup is a highly versatile structure. It’s more weather-resistant and longer-lasting than a lean-to or debris hut, but far easier to build than log cabins or cordwood shelters. Its dome shape naturally resists wind and sheds water when built properly.
What makes the wickiup particularly helpful in survival situations is how well it can be constructed with just the materials around you: things like saplings, brush, grass, leaves, and bark. Once set up, it offers excellent insulation and a surprising amount of interior space.
Unlike a lean-to shelter, which offers quick rain cover, or a cordwood shelter, which takes much longer to construct, the wickiup strikes a perfect balance between simplicity and durability. Its natural dome shape also provides better wind resistance than flat-walled shelters.
Materials You’ll Need from Nature
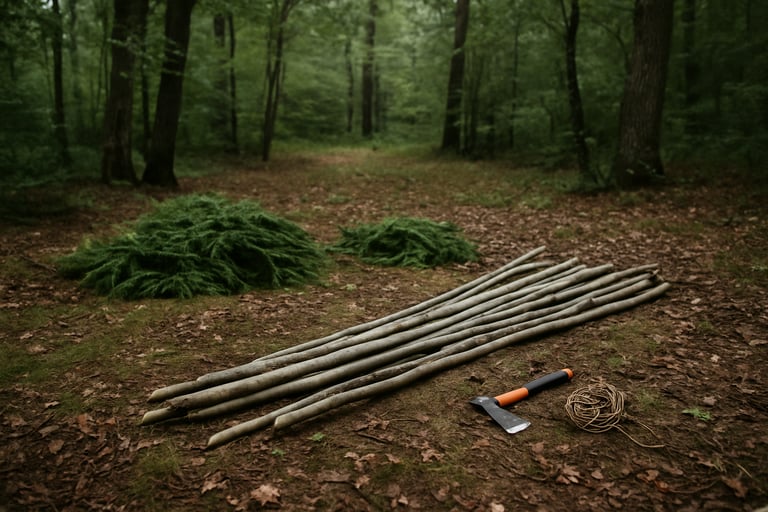
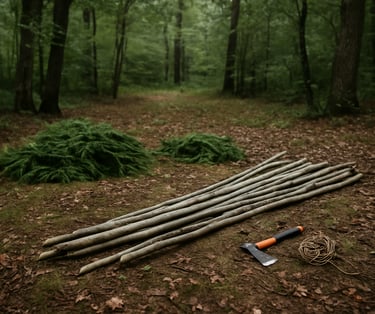
To get started, gather around 10 to 15 long green saplings that are flexible and can be bent without breaking. These will form the framework. You’ll also need a large amount of natural insulation material — this could be dry grass, ferns, pine boughs, bark, or leafy branches.
If you have a cutting tool like a hatchet or folding saw, the process is much faster. Cordage or natural vines can also help you secure the structure, but aren’t absolutely necessary if your saplings wedge into the ground well.
Step-by-Step: How to Build a Wickiup Shelter
First, pick a flat area that’s not in a flood zone and has soft enough soil to plant the base of your saplings. Begin by sticking three or four saplings into the ground in a circular pattern and bending their tops inward so they meet in the center. You can tie them together at the top using cordage or twist them naturally if they’re flexible enough.
Continue adding more saplings in a circular layout, weaving them between each other if possible for added stability. You should end up with a dome-shaped frame that resembles a small hut.
Next, cover the entire frame with your gathered insulation. Overlap materials from the bottom up so that rain runs off instead of seeping in. Add layers until you can’t see any light coming through the gaps, this will also help retain warmth inside the shelter.
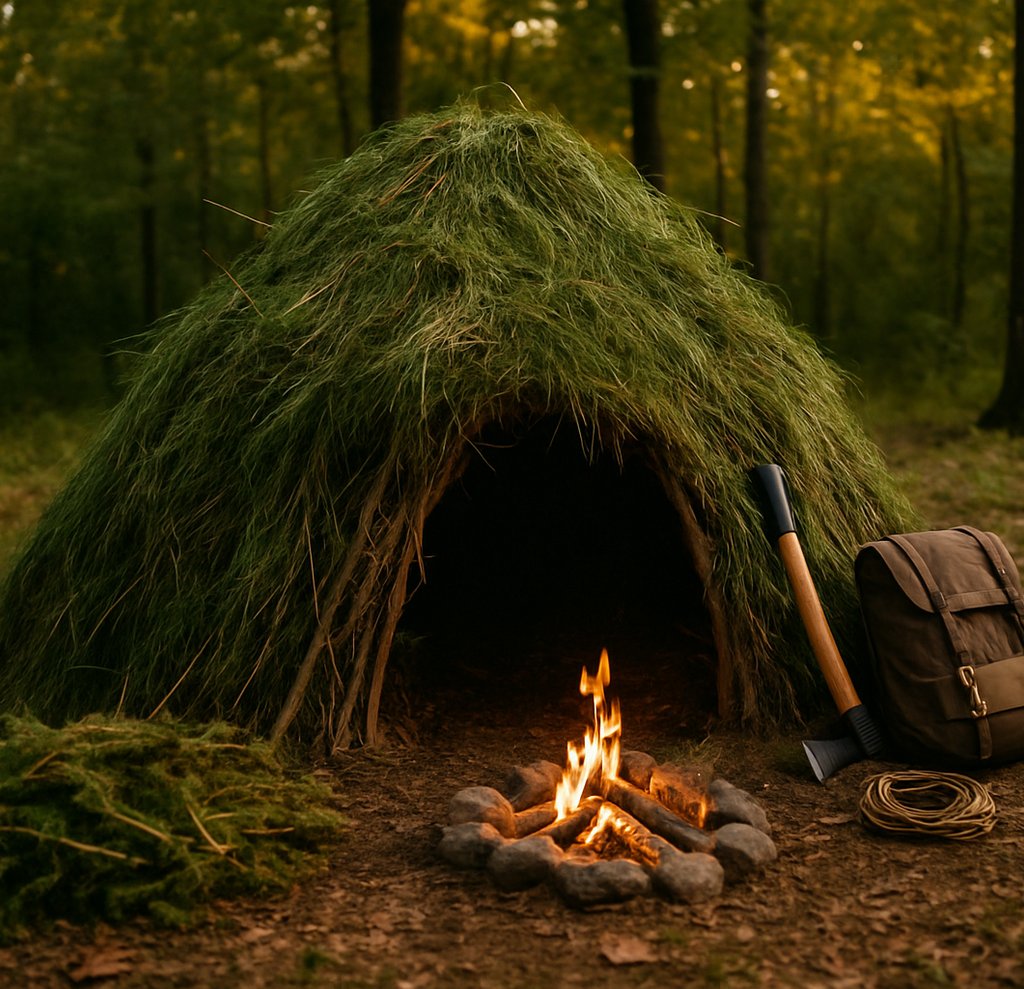
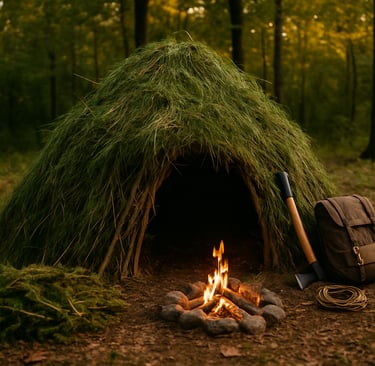
Be sure to leave a small opening for a door and, if you plan to use a small fire outside or near the entrance, leave some upper ventilation gaps near the peak.
Making Your Wickiup Comfortable and Weatherproof
The more time you spend adding layers to your wickiup, the more weatherproof it becomes. Thick brush or layered bark is excellent for keeping out wind and rain. You can even add an inner layer of leaves or grass inside the frame for additional insulation.
To stay dry, dig a shallow trench around the outside of the shelter to redirect water away during rainstorms. Inside, build a bedding area with pine needles, dry leaves, or clothing to raise your body off the cold ground and reduce heat loss.
A fire pit just outside the entrance can provide warmth, but be cautious — a fire inside is not safe unless your shelter is large, ventilated, and made entirely of non-flammable material.
To boost warmth inside the shelter, consider adding a bough bed or layering in materials commonly used in a debris hut. Both help insulate your sleeping space and can be combined with the wickiup’s structure for extra comfort in colder temperatures.
When to Use a Wickiup Shelter in a Survival Scenario
A wickiup shelter is a fantastic choice if you expect to be in one location for more than a day or two. It takes more effort than a basic tarp setup, but offers real comfort and protection from the elements, especially in colder or wetter regions.
Whether you're in a survival situation or practicing bushcraft skills, building a wickiup helps you learn resourcefulness, patience, and how to work with nature instead of against it. Once you’ve built one, you’ll realize just how practical and effective this ancient shelter design still is today.
© 2025. All rights reserved About | Privacy Policy | Terms and Conditions | Affiliate Disclosure | Disclaimer